Store |
Store
NeoAxis Store provides free content for NeoAxis developers and for game developers in common.
You can download content from the NeoAxis editor, use Stores Window for that.
Register as a vendor to upload your content.
- Max product archive size is 250 MB.
- The best place to place content is the "Assets\Content" folder. For 3D models it is "Assets\Content\Models\".
- Use the path with your username to avoid possible overlaps with other vendors, e.g. like this: "Assets\Content\Models\{username}\{model}\".
The editor is a basic tool for preparing and uploading content to the store.
Create a .product file in the folder with your content. In the Resources window open the context menu on the folder, select New Resource -> Common -> Product -> Store. In the opened dialog check the file name, click "Create and Close".

After the creation configure License, Categories, Description, Tags and other settings.

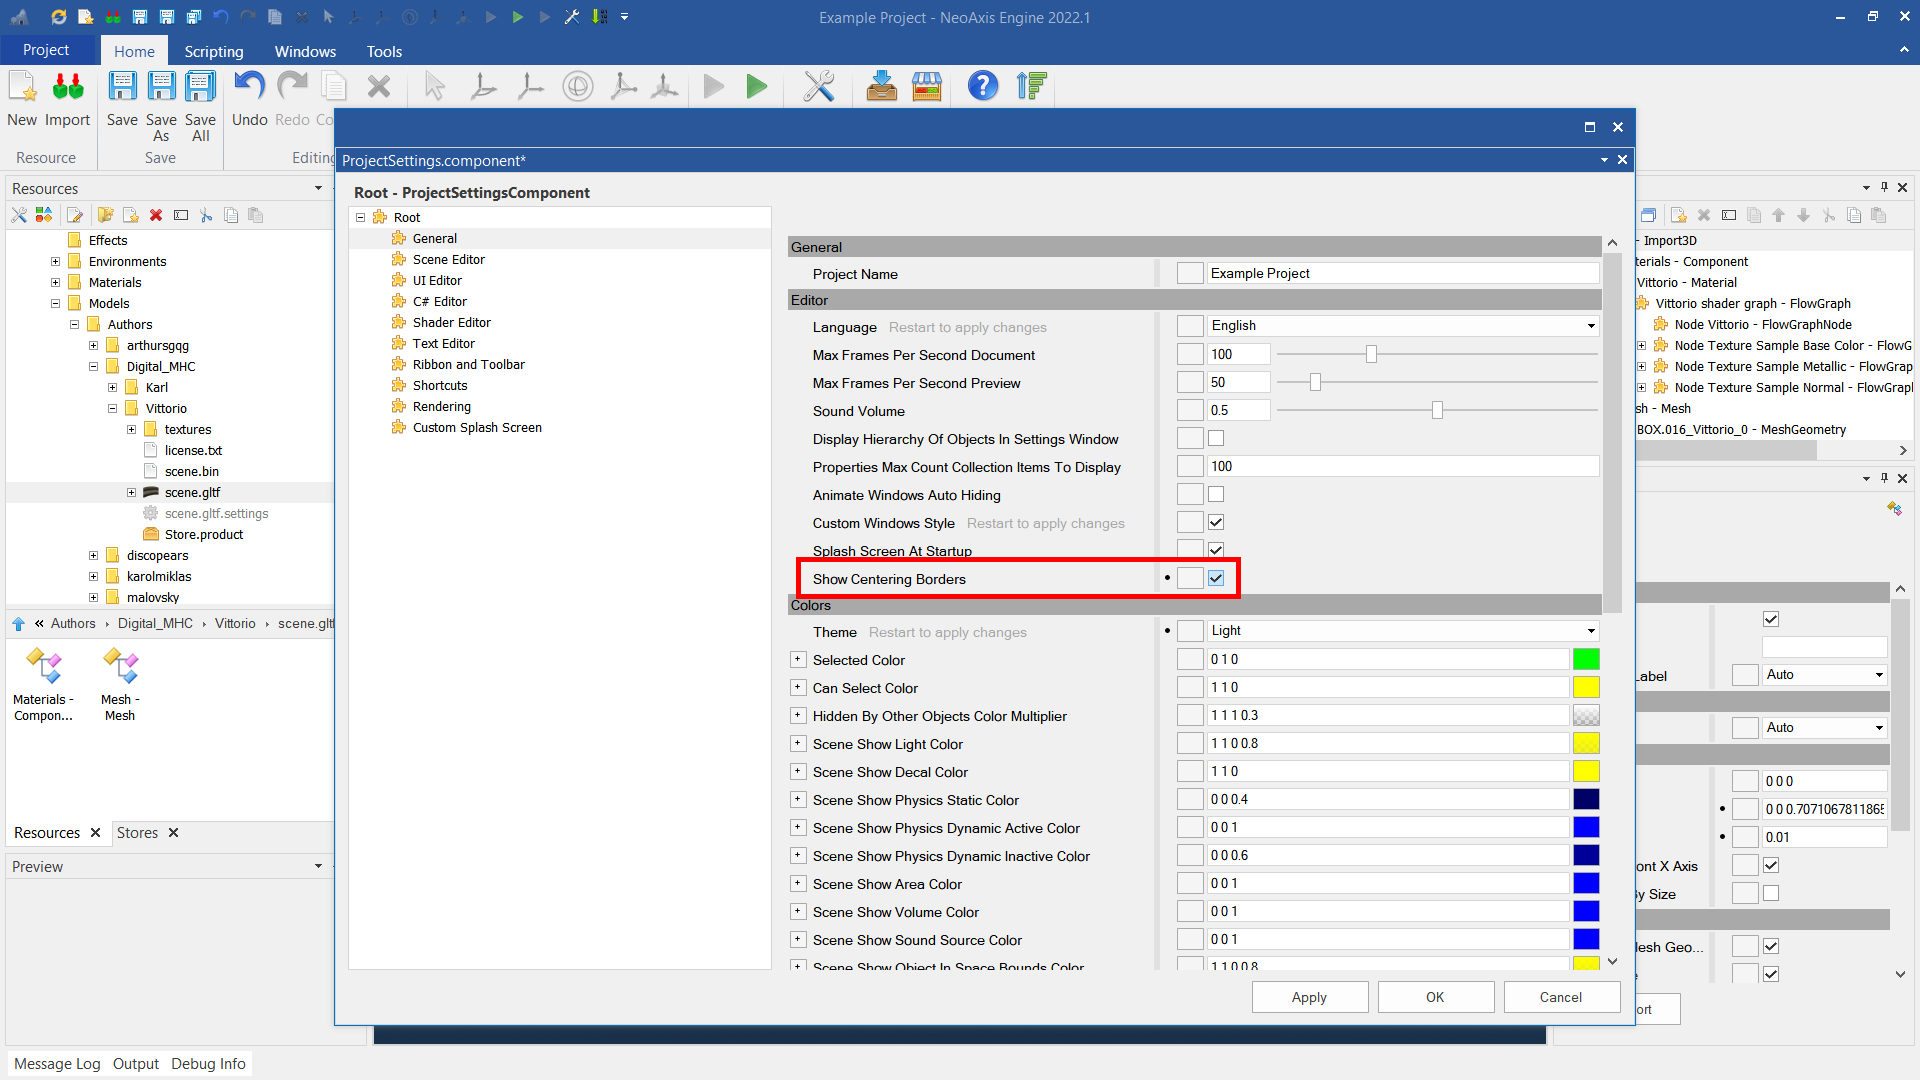
The product logo preview image is created automatically by default, but you need to configure the camera position for the 3D model.
In the screenshot, you can see a border that helps to position the camera. Use the "Show Centering Borders" property in the project settings to enable the border. Configure the camera position for the best placement inside the border.
Another way is to use a prepared image. To do this, disable the "Prepare Screenshot" parameter, configure the "Product Logo" parameter.

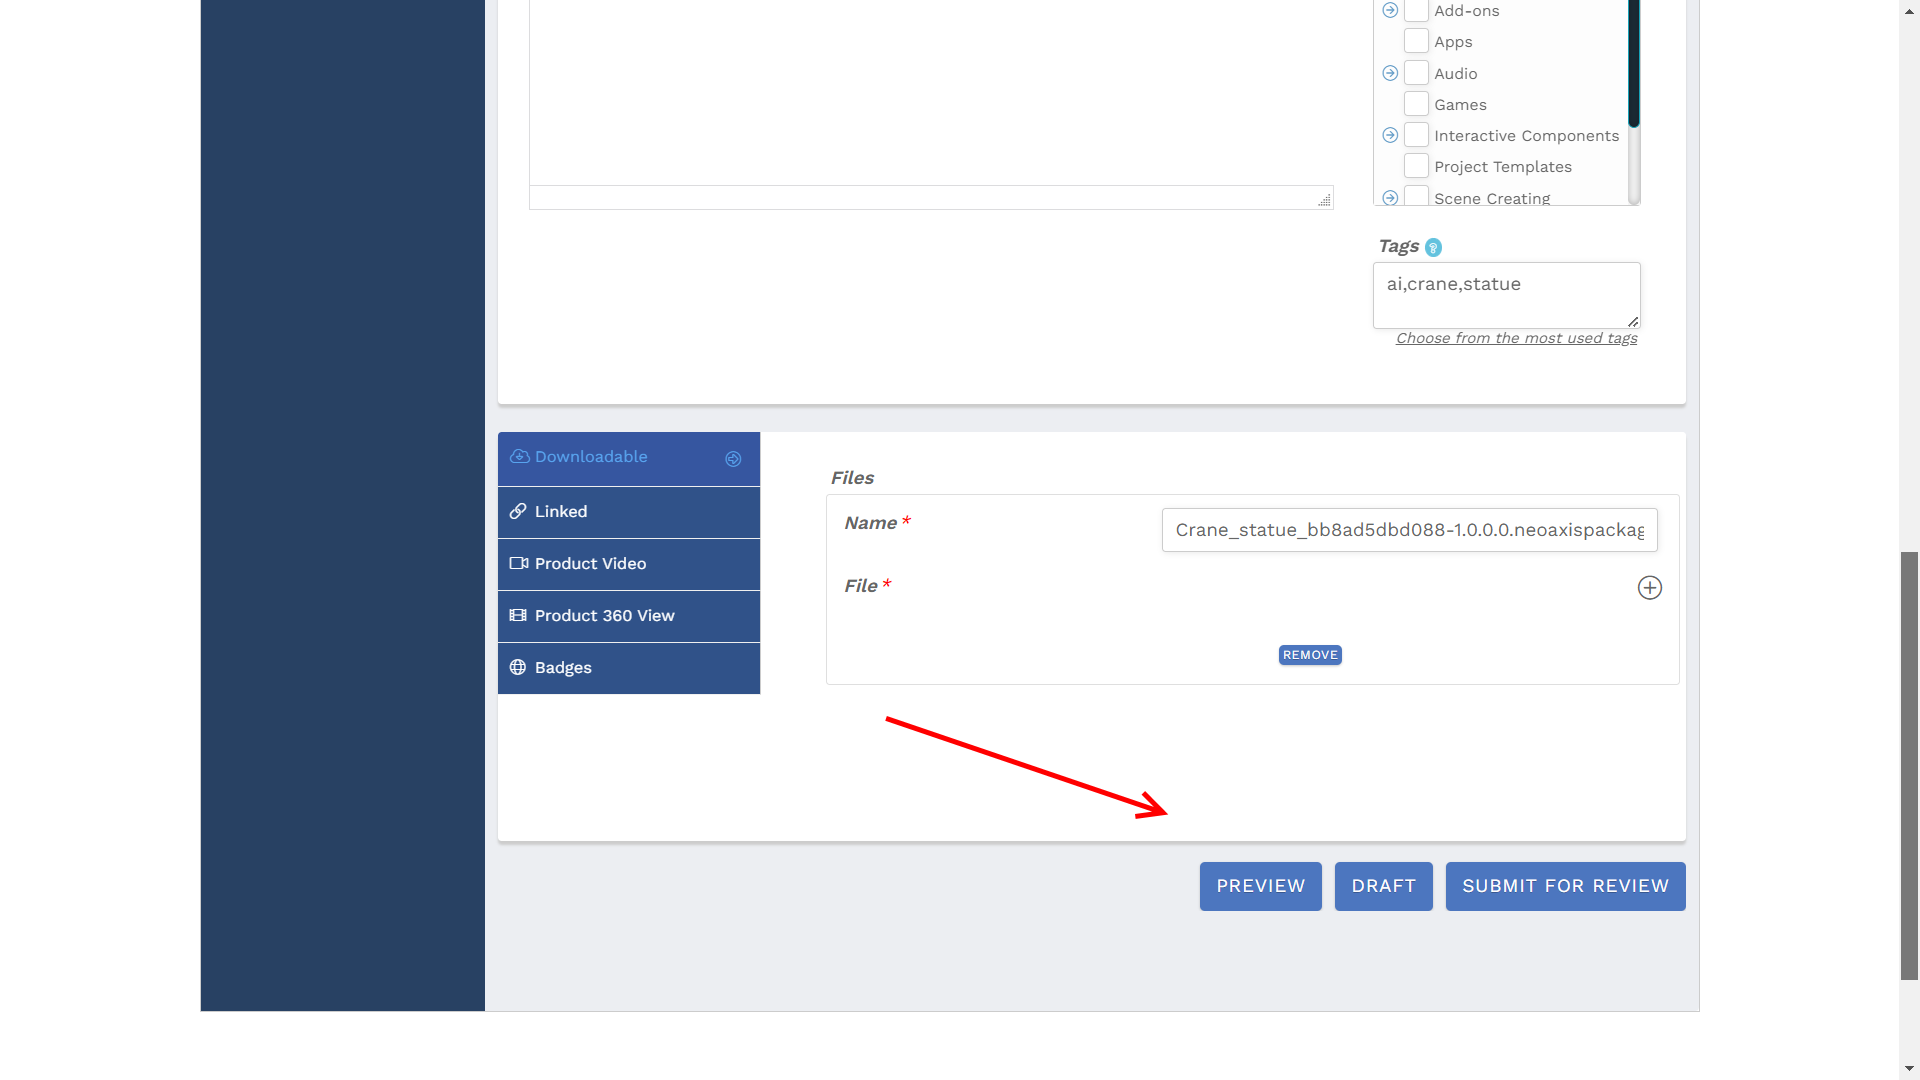
To attach additional images, use the Images property. They will be added to the gallery and to the description.
You can configure which files will be added to the output package.
- Use "Skip Files With Extension" property to skip files. Here you can remove source files, as example blend files.
- Use "Clear Files With Extension" to clear intermediate format files, which useful for re-import.
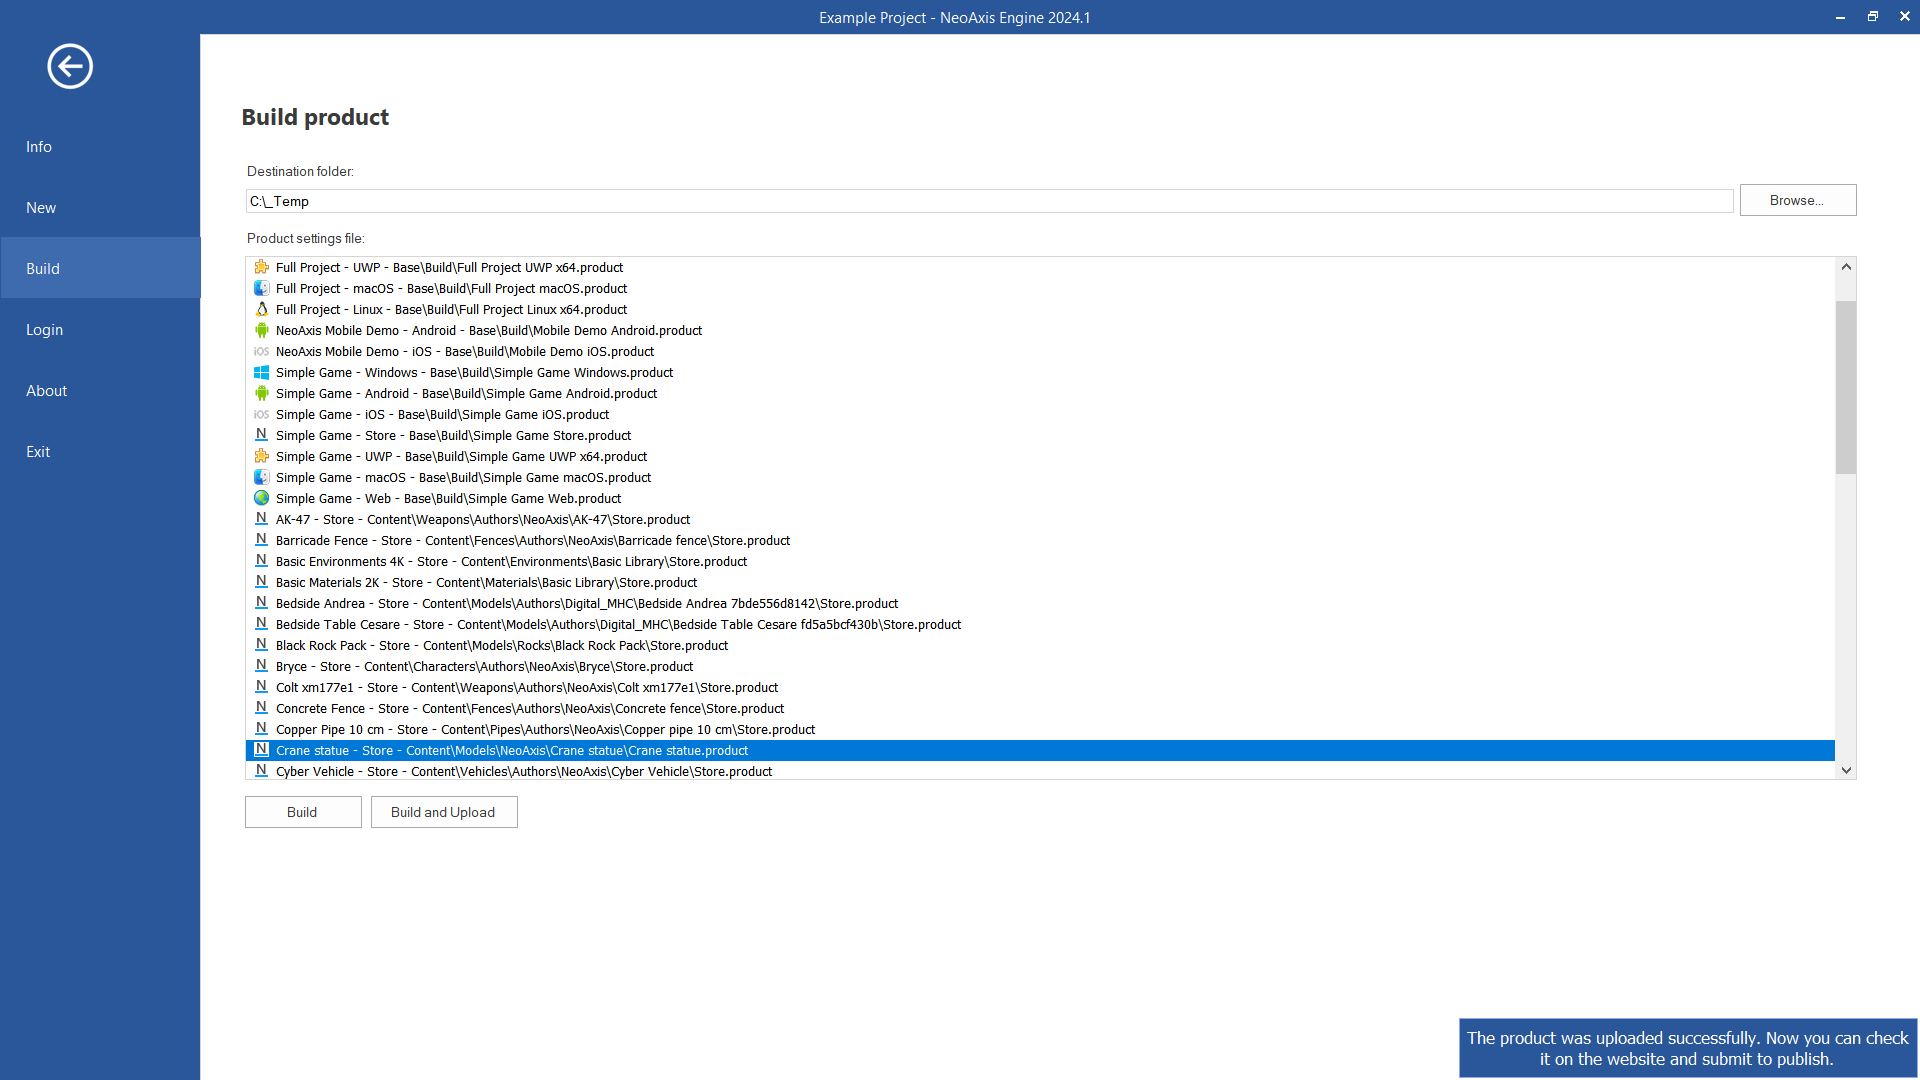
Use Build button to verify your package, neoaxispackage is a ZIP format file.
Use "Build and Upload" button to upload to the store.

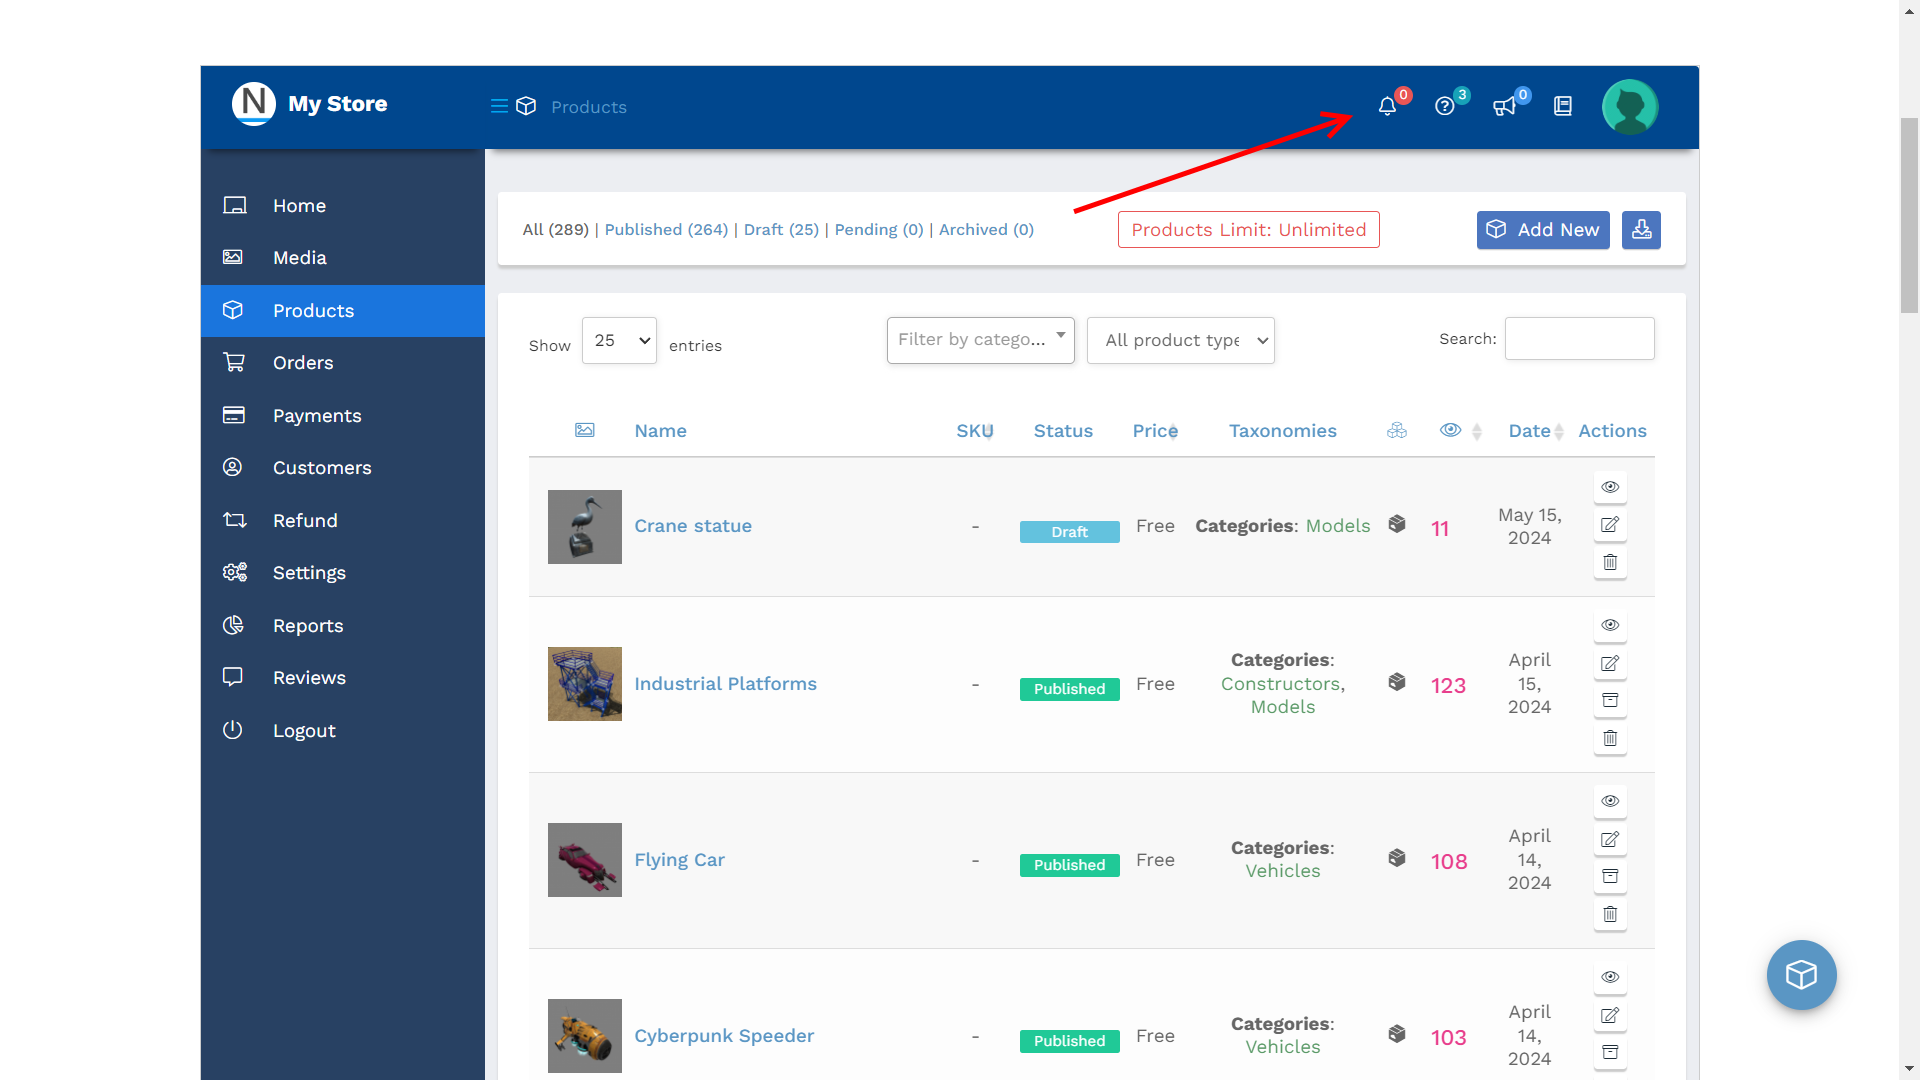
A new product will be visible in the Products section.

Before submitting for publication, use Preview button to verify the product.
After being reviewed, your product will be published. Use Notifications button to read messages from moderators.